🌟 Join us on Discord! Chat, share, and get inspired — become part of the ArtGeneration.co community
Special model features
Try clothes on a person, erase an object, clone a voice, write a song, replace an object in a finished clip — the service does all of this, but it lives in the "Additional" block of particular models and is invisible from outside: not in the catalog, not in a description, not until you pick the model and unfold the block. Collected here, from task to model rather than the other way round.
Working with images
Try clothes on a person
There are virtual try-on models: they have two separate slots — "Person" and "Garment".
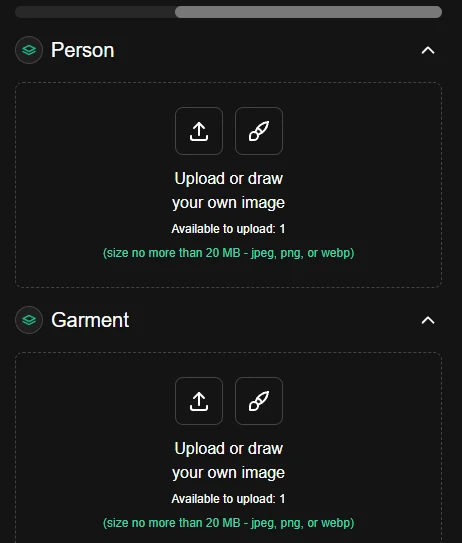
The slots look identical and sit one under the other, so they are easy to swap by mistake — and then the result is nonsense. One file goes into each.
You barely need a prompt here — the model works from two pictures. Use a full-length, front-facing photo of the person, and the garment on a white background with nobody wearing it: that way the item transfers more accurately.
Erase an object from a picture
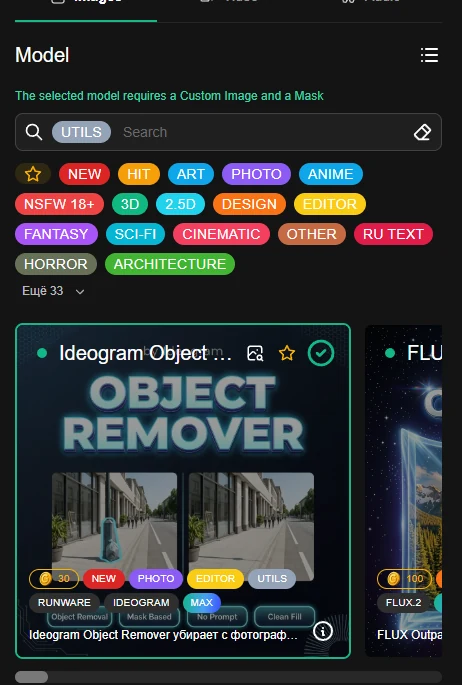
Note the two captions on this frame. Above the model catalog: "The selected model requires a 'Custom Image' and a mask". And in the prompt field, instead of the usual hint — "No prompt is required for this model — press 'Create'".
This is the rare case where there is nothing to write: you mark the excess with a mask, and that is all. Such models are found in the catalog under the UTILS tag.
Then you paint over whatever should disappear: the window says as much — "the painted area will be changed during generation". How the drawing window itself works is covered in Generator.
And in the "Additional" block such models carry a "Mask dilation (px)" parameter, whose description holds a ready recipe: dilation helps cover edges, soft contours and shadows. The default is 10, and 15–20 is recommended for hair, fur and smoke.
The parameter looks technical but solves the main problem of erasing — the halo along the edges. About masks — in Generator.
One more trait of erasing models: the result's size is taken from the source picture, so they have no usual resolution choice — and that is not a missing setting.
Extend a frame beyond its borders
The "Outpaint" button above a finished work offers four sides with one click. Dedicated outpainting models have numeric fields for all four sides at once plus a setting to crop the source to the canvas boundaries.
The difference is simple: the button is quick and by eye, the model is precise and by numbers. For a banner with exact margins, take the second.
A series of connected images
Some models have a series mode: several connected frames generated in one job.
This is the ready answer to "how do I make a comic, a storyboard or a carousel for a post". Ordinary generation gives independent pictures; here the model keeps the character between frames. Describe the hero once and list the scenes.
Set the colour palette of the result
The palette has to be switched on first, with its own toggle — "set a group of colours to control the colour scheme of the result"; the set itself only appears after that. Then there are two different palettes in the service, and they are easy to mix up:
- the simple one — up to five colours the model will use;
- the advanced one — from three to ten colours with weights: the main colour can be given more weight.
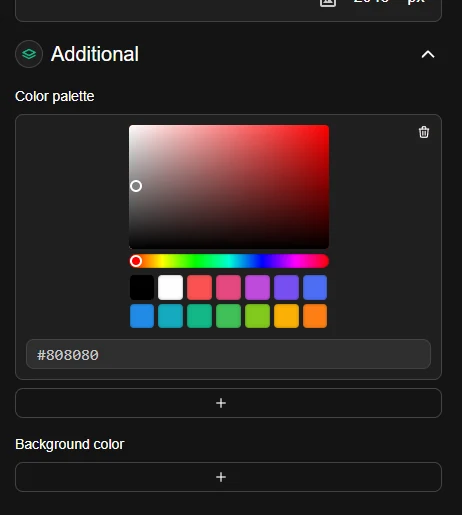
Next to them you may also find a separate "Background colour" field — it sets only the backdrop and has nothing to do with the palette. The two get confused often: the palette governs the whole range of the frame, the background colour only what is behind the object.
This is the only way to hit brand colours without hunting through prompts. Take the colours from your logo, give the main one more weight — and you get a series of pictures in one range. And to find other people's works in that same range, there is colour search — the same trick in reverse.
Transparent background
Some models have a background setting with values auto / opaque / transparent.
A transparent background is a ready PNG straight from the generator, with no trip through "Remove background". For logos, stickers and overlays this is the main thing, and it is not visible from outside.
Removing the background — two ways
- With the button above a finished work — nothing to configure;
- with the "Remove background" toggle in the "Custom Image" block, once a picture is loaded.
For product cards and collages this is faster than any editor: generate the object → press "Remove background" → get a picture with none.
Professional editing with one button
There is a "mini photo studio" model where the action is picked from a list: colourise, relight, restore, blend, change the season, turn a sketch into an image. It comes with a choice of season, a dozen kinds of lighting — from noon and blue hour to moonlight and bokeh — the direction of the light (front, side, below, above) and a colour mode: modern, vibrant, black and white, sepia.
"Relight" plus a light direction is the fastest way to bring mismatched product photos to a single look. The model's name gives no hint of this.
Upscale for print
Upscaling starts right from a finished work — with a button above the picture, and there are two of them:
- "Upscale resolution" — a plain upscale, with a ×2 and ×4 menu;
- "Upscale resolution ×2 + prompt" — an upscale that paints in detail from your description.
A soft, "mushy" picture is rescued by the second one. But it can change small things — if precision matters, take the plain one.
There are also dedicated upscaler models. They work differently: not by a multiplier but by a target size in megapixels (1 MP ≈ 1000×1000), plus realism and detail settings.
Such a model's description says outright that a smaller size costs less than a bigger one. Don't take the maximum if you are printing A4 — you would pay for megapixels you will never see.
Character reference and style reference
Some models have two separate slots: "who" and "how". And a mask can be attached to the character reference — it defines which area the reference applies to.
Separating "who" from "how" is rare: you can take the face from one picture and the manner from another.
One picture, three different meanings
An uploaded image can be understood by the model in different ways, and a setting decides which:
- remix — ordinary img2img, the picture as a base;
- sketch — the picture as a composition draft, with a "sketch strength" slider;
- character reference — the hero is taken from the picture, not the composition.
Sketch mode is a mass feature, not an exotic one. Draw crooked lines in the drawing window, switch sketch mode on — and get a finished frame following your composition. What that looks like in practice is in Generator.
Find out the prompt behind a picture
There is a dedicated button for this — "Extract prompt from image". It lives not above the result but on the preview itself inside "Custom Image": upload a picture and a magnifier icon appears in the bottom-left corner of the preview.
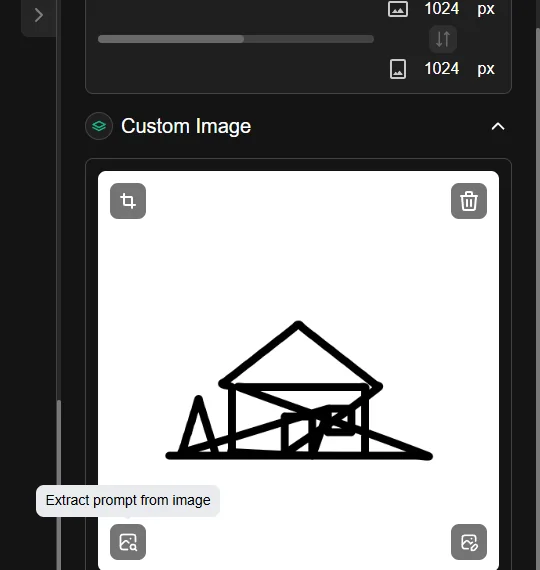
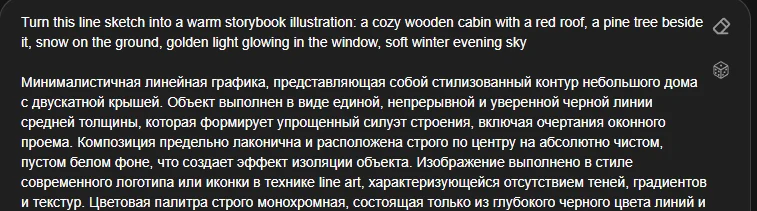
The service reads the image and writes a detailed description into the prompt field — composition, style, colours, light.
The description does not replace your prompt, it is appended to it — as a new paragraph below. Extract from several pictures in a row and the descriptions pile up in the field.
The description is written in the interface language and takes about ten seconds. On the free plan the button opens the plans window instead of recognising anything.
This is the fastest way to take apart someone else's trick. Liked a work in the gallery — send it to "Custom Image", press the magnifier and see which words describe what you are looking at.
The second route is the AI chat: a finished work has a "Discuss with AI in chat" button. There you can go beyond a description and ask what exactly to change. You need a model tagged VISION — see AI Chat.
Working with video
Animate a photo to music and set the camera movement
Some video models have an "animate a photo to audio" mode and a separate camera movement picked from a list.
The camera movement is chosen from a list rather than described in words — no need to guess the right prompt wording.
A talking avatar with spoken text
There are two routes, and they are fundamentally different.
The first is with ready sound. The model asks for a photo of the character and an audio track, and matches the lips to it itself. Such models are found under the AVATAR tag.
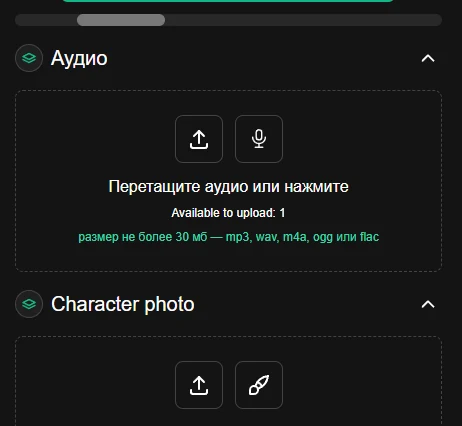
The second is with text. There is a model where text turns into speech inside the video: switch speech on, write the text, choose a voice and a language, and set the speaking style in words. No separate audio generation needed.
With such models the clip's duration is determined by the speech — and so is the price. A long text means a long clip means more expensive.
A clip from several scenes
A number of video models support a multi-prompt: the script is described scene by scene rather than in one phrase. The same place offers a shot type — the framing is picked from a list, not described in words.
Some models have a native sound checkbox, and its description says it outright: the sound is generated together with the video and costs more per second.
Replace an object in a finished clip
There are models that edit an existing video rather than generate from scratch: they replace a character or an object. They come with settings like "keep the source audio track" and audio sync — matching lip movement to the sound.
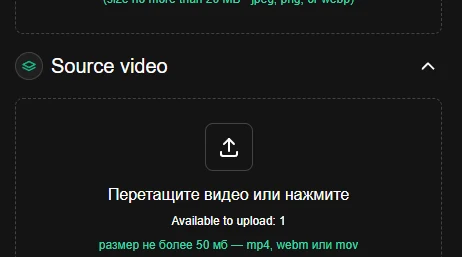
Don't confuse "Source video" with "References (video)". The first slot takes the clip you are editing, the second a sample clip from which only the manner of movement is borrowed. The slots look alike; the results are opposite.
The source clip has a length limit, written right in the field's caption — usually a few seconds at the bottom and no more than half an hour at the top. Such models will not take a long clip: cut the piece you need beforehand.
Continue your clip and other video settings
- continuing a clip from its last frames — more expensive than an ordinary generation;
- reframing a finished clip — recompose what is already shot, without reshooting;
- rendering in 1080p — a separate paid checkbox; without it, 720p;
- bitrate — higher means more detail in motion and a heavier file;
- up to 60 frames per second;
- HDR — an extended dynamic range;
- looping — the ready answer to "how do I make a seamless GIF or background";
- how the source is fitted — with bars or by filling the frame;
- export to a professional editing format — for those who know why.
There is also a short-side limit: it sets the size differently from the ordinary resolution control and does not work together with it — one or the other.
Working with sound
Three kinds of audio models
Audio models fall into three groups, and the group decides both the settings and the way you are charged:
- voicing text — text to speech, voice cloning;
- music — a track from a description, with lyrics or without;
- sound effects — individual sounds, neither music nor speech.
Don't look for "the sound of rain" in a music model — there is a dedicated one for effects, and the result will be completely different. The random-example dice also inserts different things depending on the group.
Pick a ready-made voice
Voicing models come with a ready list of voices: some have a handful, others dozens, and a list of languages often sits next to it.
This is a fundamentally different route from cloning: nothing to record. If you just need "a normal voice", take a model with a long list and listen to the presets. Cloning is only needed when the voice must be a specific one.
Voice cloning — three different tasks
This is not one feature but three, and they are easy to confuse:
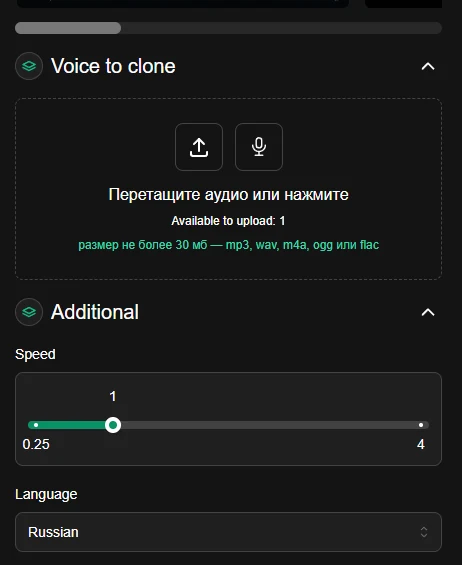
- copy a specific voice — upload or record a piece of clean speech; you do not have to transcribe it, the transcript is detected automatically. The allowed length differs from model to model — one takes anything from a second to a minute and a half, another 5–30 seconds — and it is written right in the caption under the field;
- voice another language with that voice — a separate setting for dubbing;
- invent a voice from words — "a warm male voice, calm pace".
On some models uploading your own voice disables the preset choice — these two routes are mutually exclusive.
A sample can be recorded straight in the browser — the voice block has a microphone button.
Several voices in one voice-over
Some models let you upload up to three speech samples and refer to them right in the prompt — as @Audio1, @Audio2, @Audio3.
That is a dialogue of two or three characters in one generation, not three separate voice-overs to be stitched together afterwards. The syntax itself lives in the field's caption, which nobody reads.
Use samples of equal quality with no music behind them: the model copies both the timbre and the emotion — a calm sample gives a calm line.
Next to it there are usually "Speech rate", "Pitch" (a shift of an octave up or down) and "Volume". None of the three is sent while it sits at its default — touch them deliberately.
Write a song
Music models are a full studio: your own lyrics, tempo, key, time signature and vocal language.
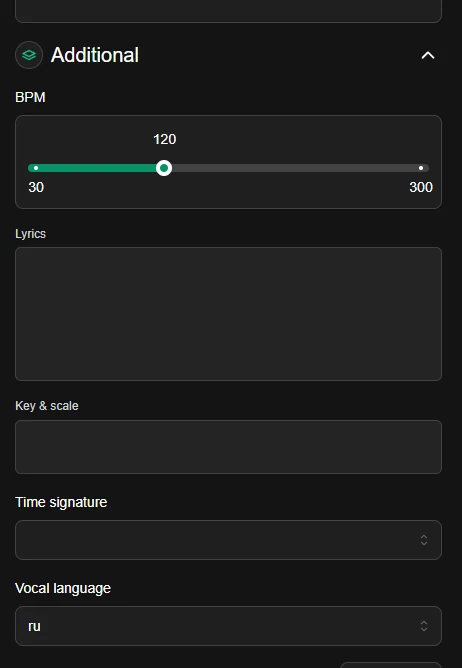
The lyrics field has its own length limit, and it differs between models — the counter sits right in the field. You cannot tell in advance, so check a long song against the counter rather than by feel.
Mark the lyrics with section tags —
[Intro], [Verse], [Chorus], [Bridge], [Outro], [Inst]. Without tags
you get a mess; with tags, a song with structure.
The tags are hinted in different languages on different models. One line
shows [Куплет] / [Припев] in the empty field, another [Verse] / [Chorus].
Copy Russian tags into an English-hinted model and it will read them as lyrics.
The rule is simple: write the tags exactly as they appear in the hint of
the field you are in.
Want a backing track — switch "Instrumental" on. The lyrics fields disappear entirely, and that is not a fault: an instrumental needs no lyrics. Switch it back off and the fields return with your text intact.
Cover and remix your own song
A feature nobody writes about: some music models have a source track field — the model will make a cover or a remix from it.
The duration is taken from the track — and so is the price. Upload a five-minute song and you pay for five minutes.
"Reference audio" means four different things
A field with the same name does different things on different models: clones a voice, makes a cover from a track, clones a dialogue voice, or takes up to three samples for several voices. Read the caption under the field — it always explains what this particular model expects.
Add sound to your clip: effects that follow the picture
The sound-effects model accepts video as input: "attach a clip — the effects will be synchronised with the picture".
This is the only place in the service where you feed in video and get out sound. The model sits on the "Audio" tab, but you have to start from a clip.
The whole scenario: make a clip → download it → switch to audio → pick the effects model → attach the clip → describe what should be heard.
The service cannot mix the sound into the clip — the output is a separate audio file. Joining them is a job for any video editor. The clip field is optional: without it the same model makes sound from a description alone.
For effects, describe an event, not a mood: "footsteps on gravel, three steps" works, "atmospheric and unsettling" does not.
Settings you meet everywhere
"Prompt extend" under many names
The same setting is called differently on different models: prompt extend, prompt upsampling, improve prompt, "enhance prompt", magic prompt. The meaning is one: before generating, a separate model expands and refines your prompt.
On music models the same setting is called "Auto lyrics" and works not on the prompt but on the song's lyrics — polishing the lines you wrote.
And it has a consequence stated right in the description: prompt extension affects reproducibility. That is, with the setting on, the same seed will not give the same frame — the direct answer to "why doesn't my result repeat".
Chasing repeatability — switch prompt extension off and set a seed. Looking for ideas — do the opposite.
Some models also have an extension mode: direct is a quick addition, agentic is a deeper rework that is unavailable together with references.
Speed versus quality under five names
Besides the general "Creativity mode", models bring their own settings of the same nature: rendering speed (turbo / default / quality), a quality level, "accelerated generation", thinking depth, "creativity" from literal to maximal, and, for text models, answer verbosity.
This is not the same as "Creativity mode": that one belongs to the service, these live in a particular model's "Additional". People usually turn both and get confused. And remember: on some models the maximum level costs more — it is stated in the field's description.
Models that search the internet
Some image models even carry two separate toggles: "Web search" — for the model to check current facts and events — and "Image search", for when it needs visual references. They switch on independently.
This is not the same web search as in the chat. There the model looks for an answer, here for facts and references for an image. The distinction is subtle, but the toggle lives in different places.
File references in the prompt
On some models a button with an "at" icon appears under an uploaded file: it inserts a reference like @Image1 into the prompt so the model knows which file you mean. The numbering follows the upload order.
The button is far from universal. And the syntax for audio is different — @Audio1 there. Don't mix them up.
Required fields and why the button won't press
Some models require an upload: a source clip, a voice, a photo of a person, a garment. Such fields are marked with an asterisk and stay highlighted until filled.
This is one of the common reasons behind "the Create button doesn't press" — along with a prompt that is too short. The full list of causes is in When something doesn't work.
Settings that change with the uploaded file
On a few models, loading a reference narrows the list of sizes and hides some settings: the provider does not accept them together with a reference. It is rare, but it happens.
Where to go next
- How to switch all of this on and where to find "Additional" — Generator.
- How to find a model for a task — Model catalogs.
- What it costs — Coins and limits.
